It's now into March and lots of things have been happening.
Today I finished painting 2.5 doors, hallway, 4 frames. the rest will wait until after the furniture moves.
On Sunday, my Dad enjoyed the sun and hauled away all the renovation garbage. This involved an old toilet, metal scraps and scraps of wood. Replacing the baseboards was easier than putting back cracked old boards. Also, the old upstairs toilet was put in the basement bathroom, so now all the toilets in the house are low flow. yay for energy savings!!
I also finished sewing and mounting the shower curtain. This fabric was the first thing I bought for the bathroom renovation and the only thing that looks exactly how I pictured it in my head.
It has been a month at the "almost done" stage. Where mirrors need to be bought and mounted, toilet paper racks mounted, towel racks ordered, etc. I'm sure people who have previously renovated couple tell me that this stage of being bored with all the details and wanting things to be done will end, but it feel like it is dragging on forever.
Two more window frames to paint before friday.......
Showing posts with label harris. Show all posts
Monday, March 12, 2012
Monday, February 27, 2012
bathroom posting
There has been much progress going on and the bathroom is almost done.
here are today's featured improvements:
there is a setting inside the shower control that's anti-scauld. that is now set up. you now can turn it on so that "full blast" is "hot", but not "scalding".
These are the original taps for the bath tub. the drain and overflow drain cover are new.
The taps where not set correctly, so dad had to grind them out and reset the insides so that they worked and did not leak. a big, tedious job.
The outside of the tub, you can see the new drain and overflow pipes and the lines that feed the tub.

This is the vanity and the new sink.
This is the new low flow toilet. I bought it at the Home Depot/ City of Guelph instant rebate day. Hello $25 toilet.
The medicine cabinet above it is the flaren model from ikea. It has anti-slam hinges.
in the corner where the old closet was, there is a new cabinet. it is the ikea akurum kitchen high cabinet. with one small door and one large door.
the hardware clips on with pressure expanders, so there are no screws in the door.
it's bolted to the wall in the back and caulked so that water can't get behind it. The side of it though will need painting with melamine paint, to ensure the water stays out.
so Dad went to a plumbing place called Stan's in Guelph and the person who bought this unit returned it, so it was on sale for $60. SOLD!
I'm unhappy with the way it interfaces with the shower head, so i'm on the search for a longer bar, but it will do for now.
I better get sewing up the curtain!
The vanity came with a teeny, tiny cut out for the plumbing and I thought the entire shelving system was going to come out, but dad plumbed it with only a small circular cut out! yay!
there are only small things left to do:
- make and hang shower curtain (done Mar 16th)
- install double towel bar (done April-ish)
- re-insulate and replace the ceiling below it in the basement (May 2012)
- paint the frames and install doors (done Mar 16th)
- install the blind (done Mar 16th)
The launch is March 17th!
and then it's done
here are today's featured improvements:
there is a setting inside the shower control that's anti-scauld. that is now set up. you now can turn it on so that "full blast" is "hot", but not "scalding". These are the original taps for the bath tub. the drain and overflow drain cover are new.
The taps where not set correctly, so dad had to grind them out and reset the insides so that they worked and did not leak. a big, tedious job.
The outside of the tub, you can see the new drain and overflow pipes and the lines that feed the tub.

This is the vanity and the new sink.
This is the new low flow toilet. I bought it at the Home Depot/ City of Guelph instant rebate day. Hello $25 toilet.
The medicine cabinet above it is the flaren model from ikea. It has anti-slam hinges.
in the corner where the old closet was, there is a new cabinet. it is the ikea akurum kitchen high cabinet. with one small door and one large door.
the hardware clips on with pressure expanders, so there are no screws in the door.
it's bolted to the wall in the back and caulked so that water can't get behind it. The side of it though will need painting with melamine paint, to ensure the water stays out.
so Dad went to a plumbing place called Stan's in Guelph and the person who bought this unit returned it, so it was on sale for $60. SOLD!
I'm unhappy with the way it interfaces with the shower head, so i'm on the search for a longer bar, but it will do for now.
I better get sewing up the curtain!
there are only small things left to do:
- make and hang shower curtain (done Mar 16th)
- install double towel bar (done April-ish)
- re-insulate and replace the ceiling below it in the basement (May 2012)
- paint the frames and install doors (done Mar 16th)
- install the blind (done Mar 16th)
The launch is March 17th!
and then it's done
Tuesday, February 21, 2012
Getting there
I got an email today from IDoneThis.com
Three months today the new tub was lifted into my place. Today I got reconnected.
Monday, February 13, 2012
Floor is done, and the walls begin

This is what the floor looks like after grouting. I'm not sure if the grout is supposed to dry the lighter grey or the darker grey. In any case, it will be sealed in two weeks.
Which do you like?
I've practiced sealing grout on the kitchen, so I now know what to do when I seal the floor.
I like how they echo the direction of the wood in the rest of the house. They are also being used as baseboards in the bathroom.
Now that the floor is done, the wall tiling is beginning.

That rag in the wall is covering the showerhead, so dad doesn't bonk his head on it.
Dad's been in this room with the glue too long I think. (Mom and I went to a Tafelmusick in Toronto and took the day off.
you can see the grey tile as a baseboard behind the cardboard at the bottom of the wall.
Also, i'm standing on a chair.
Yes my toque is on inside out. That is so the hat is not wrecked when dad drops tile glue on my head.
This happened twice. eeeew.

The back wall of the bathroom is now tiled floor to ceiling.
The light is waterproof and recessed.
The next wall.
Notice the way the staggering around the corner is done so that there is no "sliver" of tile and the pattern from the back wall is maintained.
Nice shot of the baseboards.
The tiling will go up to the window, where a larger frame, and a wider sil is going in. What use is window ledge if it's too narrow to put a plant on it ?!?
Tuesday, February 7, 2012
bathroom floor is progressing
Bathroom floor update:
after the electrical inspector from ESA left, the radiant heat wires were covered with cement.
Here's what it looks like in the hallway.
Friday 5pm
It takes 24 hours to dry.
Here it is 24 hours later, Sat. around 5pm.
Not dry.
So a bright painting light was applied throughout Sat. night and throughout Sunday and Sunday night to use the heat to dry the floor.
Sunday's plan to begin tiling the bathroom floor was disbanded.
But in the area that was mostly dry, we put down the testing strips for the pattern.
diagonal vs. length-wise.
It was determined that running it perpendicular to the hallway would make it seem narrow and the diagonal was too modern for the house (remember 1919) . also the length-wise layout matches the wood layout in the rest of the house.
Do you agree?
So what happened on Monday - the room had tiling lines places, and the cement dried. A new trowel was also purchased.
Tuesday the tiling finally began.
after the electrical inspector from ESA left, the radiant heat wires were covered with cement.
Here's what it looks like in the hallway.
Friday 5pm
It takes 24 hours to dry.
Here it is 24 hours later, Sat. around 5pm.
Not dry.
So a bright painting light was applied throughout Sat. night and throughout Sunday and Sunday night to use the heat to dry the floor.
Sunday's plan to begin tiling the bathroom floor was disbanded.
But in the area that was mostly dry, we put down the testing strips for the pattern.
diagonal vs. length-wise.
It was determined that running it perpendicular to the hallway would make it seem narrow and the diagonal was too modern for the house (remember 1919) . also the length-wise layout matches the wood layout in the rest of the house.
Do you agree?
So what happened on Monday - the room had tiling lines places, and the cement dried. A new trowel was also purchased.
Tuesday the tiling finally began.
Thursday, February 2, 2012
The Wires that bind you
Today the radiant heat flooring system, Part 1 was installed.I'm still in a naturopath assigned detox diet, so I'm cranky. This did not bode well.
In any case, Dad and I installed the sucker.
Here are the steps:
1a. vacuumed the floor
1b. sponged down the floor
3. install the lead from the wire to the thermostat holding area in the wall
4. measure 2" out from the walls and 1" out for objects (and potential future objects). measure 6" out from the toilet. I used orange highlighter for giggles.
doesn't that shadow on the wall look like a nose?
5. begin layout out the wire at 4" increments. have a rule close by to double check your spacing.
6. realize there are some weird spots and try laying it out a different way.
7. run out of cable too early and remove 1/2 of it, to the doorway and start again.
8. finish it and take a break. a well earned break.
9. have someone who owns a meg-ohm-meter test the cable to make sure it's still intact.
note: the spacers that are not screwed down are placed there for stabilizing the wires tomorrow. We ran out of screws and were tired of crouching and balancing over wires.
Friday Feb 3 Update: dad screwed down the rest of the wire holders today. The installation passed ESA inspection and it was covered with mortar. Now it sits for 24hours and hardens and dries.
ETA: It is now Sunday night and the floor was put in Friday afternoon, it is still not dry, so the heat is cranked and a heat lamp has been applied.
Help me choose a bathroom vanity light
The shower fixture is:
The sink faucet is:
The vanity:
the mirror for above the vanity:
what sort of cheap, but matching vanity lighting should I get?
The sink faucet is:
| The vanity fixture |
| clawfoot tub |
The vanity:
the mirror for above the vanity:
what sort of cheap, but matching vanity lighting should I get?
a sidebar: how to avoid a silly clawfoot tubs shower
So I love clawfoot tubs to bathe in, but for a shower, I've found they often suck. Here's why:
1. the shower curtain wont' close all the way or it sticks to you
2. the shower spout is not high enough and/or wiggles
3. there is no where to put your stuff
4. there is a stupid hand held shower thing that you're supposed to hold up while you are showering.
5. the clip that the hand held shower wand clips into is broken.
6. the shower spray is narrow, doesn't hit you and just hits the curtain.
7. that shower ring that holds the curtain is flimsy and wobbles
So to address these deficits with my clawfoot tub, the following is happening:
1. I have laminated cotton yardage for the curtain. This means the length and width is completely adjustable. And non-flimsy.
2. The shower spout is located above the centre of the tub, minus the angled back, there is approx 10" on either side of you and the tub is 30" wide. The shower spout is mounted on the wall, 7ft in the air. Solid.
3. I have a bathtub caddy that will sit across the angled part of the tub, so you can use it while showering, but it's not in a space you stand.
4. there is no hand held shower thing. The shower is plumbed in separately from the bathtub taps. the shower is triggered by turning on a wall controller.
5. no plastic breaking bits.
6. The shower head will be a rain shower head that falls straight in the middle of the length and width of the tub. I may also put it on an elbow, so it can be raised and lowered.
7. I have not solved this problem yet or found a shower ring that is under $300. Any thoughts/help anyone?
![]() |
| oh look, no ability to shower at all! |
2. the shower spout is not high enough and/or wiggles
3. there is no where to put your stuff
4. there is a stupid hand held shower thing that you're supposed to hold up while you are showering.
5. the clip that the hand held shower wand clips into is broken.
6. the shower spray is narrow, doesn't hit you and just hits the curtain.
7. that shower ring that holds the curtain is flimsy and wobbles
So to address these deficits with my clawfoot tub, the following is happening:
1. I have laminated cotton yardage for the curtain. This means the length and width is completely adjustable. And non-flimsy.
2. The shower spout is located above the centre of the tub, minus the angled back, there is approx 10" on either side of you and the tub is 30" wide. The shower spout is mounted on the wall, 7ft in the air. Solid.
3. I have a bathtub caddy that will sit across the angled part of the tub, so you can use it while showering, but it's not in a space you stand.
4. there is no hand held shower thing. The shower is plumbed in separately from the bathtub taps. the shower is triggered by turning on a wall controller.
5. no plastic breaking bits.
6. The shower head will be a rain shower head that falls straight in the middle of the length and width of the tub. I may also put it on an elbow, so it can be raised and lowered.
7. I have not solved this problem yet or found a shower ring that is under $300. Any thoughts/help anyone?
The temptation
Sorry about the blogging hiatus. I am dealing with some health issues & work busy-ness.
Today, the renovation's incremental progress hit a milestone - all the plumbing rough ins are now done. Dad added extra special touches, such as:
- moved the plumbing between the joists in the basement, to raise the basement ceiling 6"
- routed the shower and sink water lines separately (so people can brush their teeth without scalding someone in the shower)
- the vent for the bath/shower drain was move from an interior wall into an exterior wall. this eliminates a wall in the bathroom.
But this "state of readiness" presents a problem to me...
See all those knobs and switches?
If I turn any of them, water will shoot out 20ft.
I've been firmly instructed
NOT TO TOUCH
any of them.
ooooo, temptation!
Tomorrow we begin the floor heating system. The box came with a DVD, and instructions and a 1-800 number.
I'm taking the afternoon off work to help.
Here's a link to the installation steps.
Today, the renovation's incremental progress hit a milestone - all the plumbing rough ins are now done. Dad added extra special touches, such as:
- moved the plumbing between the joists in the basement, to raise the basement ceiling 6"
- routed the shower and sink water lines separately (so people can brush their teeth without scalding someone in the shower)
- the vent for the bath/shower drain was move from an interior wall into an exterior wall. this eliminates a wall in the bathroom.
But this "state of readiness" presents a problem to me...
| the toilet water intake (the braided silver tube) and poo drain. |
| vanity hot/cold inputs and drain. |
See all those knobs and switches?
If I turn any of them, water will shoot out 20ft.
| the bathtub faucet hot/cold and drain pipe. |
| this is the shower on switch. |
I've been firmly instructed
NOT TO TOUCH
any of them.
ooooo, temptation!
Tomorrow we begin the floor heating system. The box came with a DVD, and instructions and a 1-800 number.
I'm taking the afternoon off work to help.
Here's a link to the installation steps.
Saturday, January 28, 2012
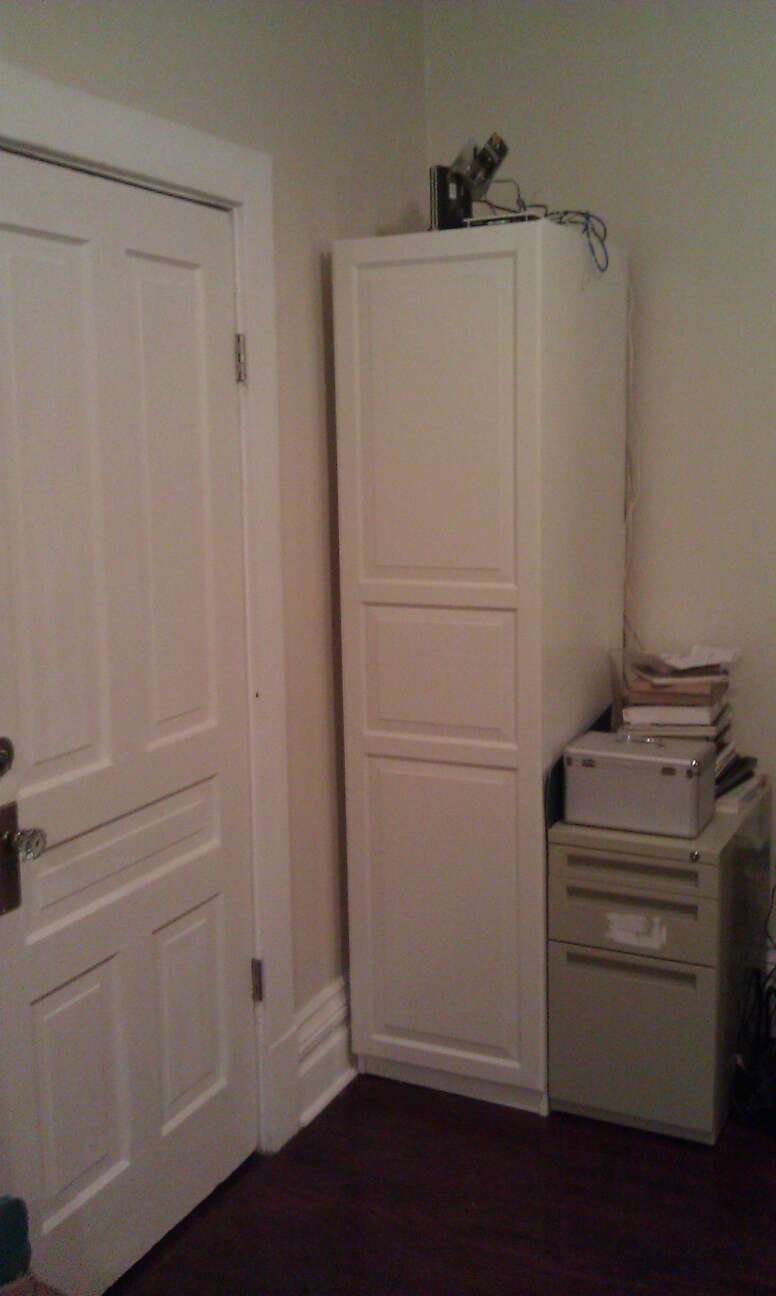
A new closet
One of the flaws of this house is the lack of coat closets in both suites. Earlier coat hooks were installed outside the doors, but that just doesn't cut it.
So there's been a plan for a while to install the 50cm Pax with Birkland door behind the entrance door to the main floor apt.
Ta da!
also, this means that the wireless internet unit is higher and more equi-distant between the two suites. So win/win.
So there's been a plan for a while to install the 50cm Pax with Birkland door behind the entrance door to the main floor apt.
Ta da!
also, this means that the wireless internet unit is higher and more equi-distant between the two suites. So win/win.
Wednesday, January 25, 2012
More Progress
Since I last updated, the floors have made progress - they are now leveled with self-leveling skim coat
and backer board applied over top. I have no pictures of that.
Next the wiring was fished through the ceiling/attic/walls to install a light in the hallway.
My mom found a set of pendants at the Restore over the summer, so the 2nd one is going into the hallway.
My dad is modeling the surprise at seeing matching lights when you look from the kitchen into the hall. also, he's covered in 100 year old dust from crawling between the joists.
I make dinner and clean up, that's my role.
Oh and pay for things. can't forget that.
The brick wall is where the extension butts up against the original house. Sure I would expose the brick in the bathroom and run conduit wiring and get fancy. But that's not in the cards for this house.
A light was also installed in the bathroom as well, above the bathtub/shower.
The only lighting left to install/choose is the vanity lighting.
___________
Today the fan was installed. I chose one that was 0.8SONE. It's quiet and awesome.
Dad installed it like a boss.
The attic also got insullated.
Normal houses have ceilings made of joists and dry wall. Mine has toungue and groove wood panels, covered by drywall, covered in plaster. Whoever built this house really, really, really liked their plaster.
and backer board applied over top. I have no pictures of that.
Next the wiring was fished through the ceiling/attic/walls to install a light in the hallway.
My mom found a set of pendants at the Restore over the summer, so the 2nd one is going into the hallway.
My dad is modeling the surprise at seeing matching lights when you look from the kitchen into the hall. also, he's covered in 100 year old dust from crawling between the joists.
Oh and pay for things. can't forget that.
A light was also installed in the bathroom as well, above the bathtub/shower.
The only lighting left to install/choose is the vanity lighting.
___________
Today the fan was installed. I chose one that was 0.8SONE. It's quiet and awesome.
Dad installed it like a boss.
The attic also got insullated.
Normal houses have ceilings made of joists and dry wall. Mine has toungue and groove wood panels, covered by drywall, covered in plaster. Whoever built this house really, really, really liked their plaster.
Saturday, January 21, 2012
The Work Continues: slowly but surely
![]() |
| Removing the rotted out floor |
![]() |
| lookin' out my back door |
| the holes in the floor are being fixed. |
| sealing the door sill with foam |
| the floor is now fixed! |
| the floor is almost ready for the skim coat. |
| the floor stuff called "skim coat" is what makes it level over all the previous floor gunk |
| the hallway needed extra skimcoat, it was bumpy! |
Next up is floor cement board, re-screwing down the 6" apart screws and the floor is done except for radiant floor installation and tile. (planks on a diagonal)
now the final planning for plumbing and electrical can go in.
Should there be lights over the bathtub and the vanity? on separate switches?
Where should the radiant floor go? How much? into the hallway?
If the rain shower head is centred over the non-sloped area of the tub, how far away would the light be if it is centred on the ceiling?
The bathroom configuration has been changed twice, think we will have to move in the vanity at least to make a final decision. eeeps!!!
Subscribe to:
Posts (Atom)